How to shoot light trails
SS= 8 sec. Longer SS was blowing out the white middle of the right side near the freeway signs. So, we stayed a little lower.
The last round of my Manual Exposure class ended with a request for a tutorial on how to shoot light trails. So, here we go! Light trails are a really fun way to add life and movement to a static scene. Plus, they just look really cool and show off your mad skills!
Here is what you need to photograph light trails:
A tripod - I know, not everybody’s favorite thing. Sorry! It is an absolute must.
Cable release - not absolutely necessary, but super helpful. We’ll be using VERY long shutter speeds, so your finger pressing the button is enough to blur your photo. You can try to time it with your delayed shutter, but there is no way I could master it! Light trails are all about timing on moving objects that you have absolutely no control over. A quick hit on the button is way more likely to end well for you. I use this cable release, and it has been well worth the $20 investment!
Another light source to get your settings ready can be helpful, since you’re working in the dark. Your phone or a small flashlight work great.
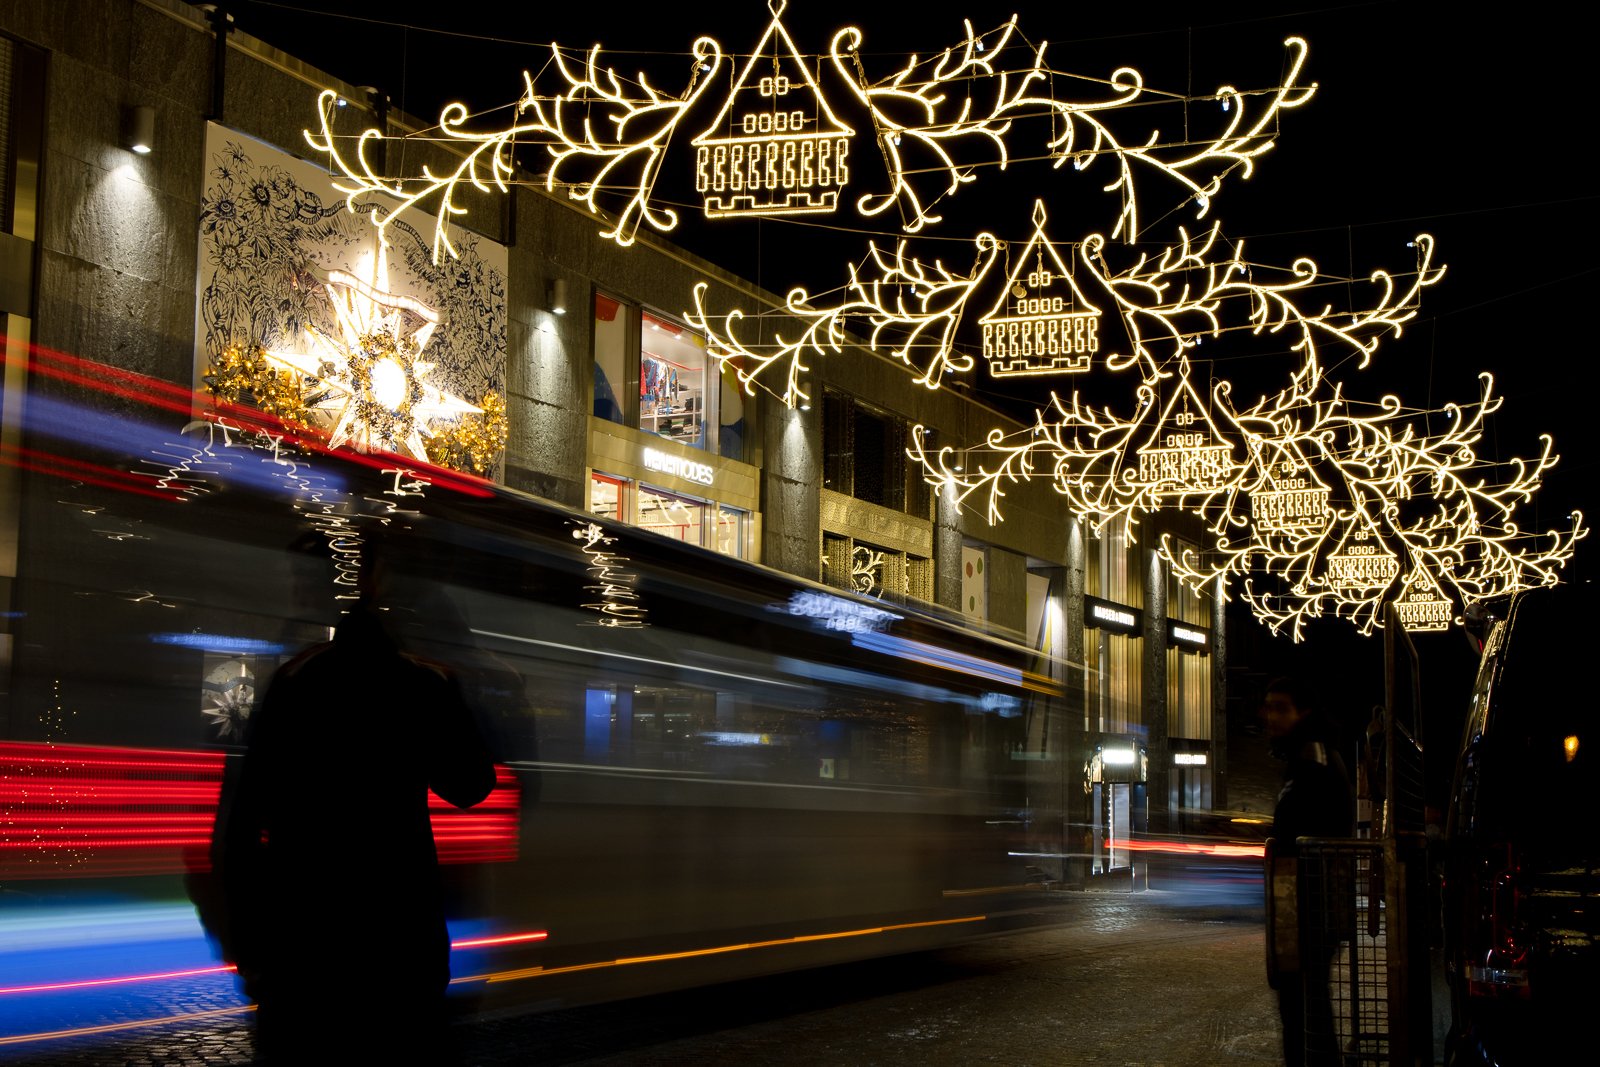
SS = 2 sec. I could have gone a little longer, but I was REALLY close to the road and the bus, and I didn’t want to blow it all out. I really just wanted that line creating the silhouette on the person walking, and the leading line into the frame
I love to shoot light trails during Blue Hour. This is the hour after sunset, while the sky is a rich blue, before it goes full dark. The colors are vibrant and show off the lights in a really dynamic way. Dark works, too, and sometimes that is just when you’re available! Sunset can be pretty, but often you still have too much light for the long exposure. You can play with it, and sometimes you can get it to work. But if you’re trying this technique for the first time, go for blue hour!
Settings for Light Trails:
Your settings will vary, depending on how fast your cars are moving and how close you are to them. But here are some good good numbers to start with:
Shutter Speed - This is your most important factor. To get streaks of light, rather than points, you need a long shutter speed. Start somewhere around 5-10 seconds. I have gone as low as 2-4 and as high as 15. Play around with it. If you don’t have long enough trails, open your shutter a little longer. If everything looks blown out, stop it down to a shorter speed.
ISO - It is really easy to get get grain in your photo with low light, so keeping that ISO low is critical. If you can, keep it at 100. If not, you probably have a little wiggle room, but I wouldn’t push it past 400. Make sure you also keep an eye on your highlights - lit up buildings or other areas of the frame that are lit. You can always take a test shot and zoom in to see how it looks, but low is best.
Aperture - This is where you can adjust to get the light you’re looking for. Remember that a city scene usually calls for a large depth of field, so f/8 is probably a good place to start. If you want any lights in the scene to look like stars, rather than circles, push that closer to f/20.
SS = 4 sec. Again, really close to the road, so a “shorter” shutter speed. I used the lights in this case to “cover” the busy-ness of cars and signs in the foreground of the image.
The most critical part of shooting light trails is to EXPERIMENT! Experiment with timing, when the car enters your frame, and how long you like the exposure. Reframe your subject, and look for the lights to form interesting shapes. Can you find a curve or a diagonal? Can you make your light trails form a leading line? This is a playful and dynamic technique, so have fun with it!
If you try the tutorial and end up posting a shot, tag me in your photo! I’d love to see what you come up with!
#tamicutlerphotography
If any of the information in this post makes your head spin, check out my ebook on Mastering Manual Exposure! We’ll have you understanding those settings in no time!


